


第35節 - LibGDX: Input Control (Polling VS Event Driven Input)
這一節我會介紹LibGDX的Input Control (Polling VS Event Driven Input)。
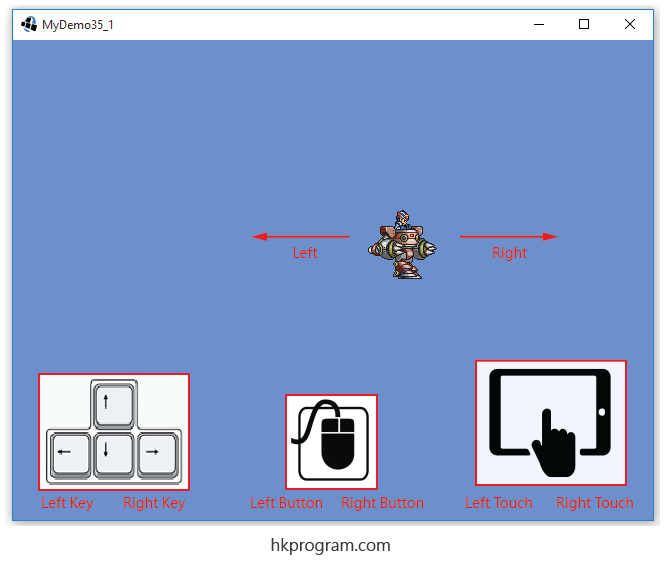
我在第33節 - LibGDX: Animation & Spritesheet介紹過圖片(hero1.png)向右移動的動畫效果; 第34節 - LibGDX: Keyboard, Mouse & Touch Screen Controlt介紹過Keyboard, Mouse和Touch Screen的Polling Input, 這一節我會介紹Polling Input與Event Driven Input的分別。
要在程式內用到Keyboard, Mouse & Touch Screen控制,主要有以下兩種方法,我會詳細介紹:
- 方式1 - Polling Input。
- 方式2 - Event Driven Input。
Polling Input VS Event Driven Input
以下是Polling Input和Event Driven Input的比較:
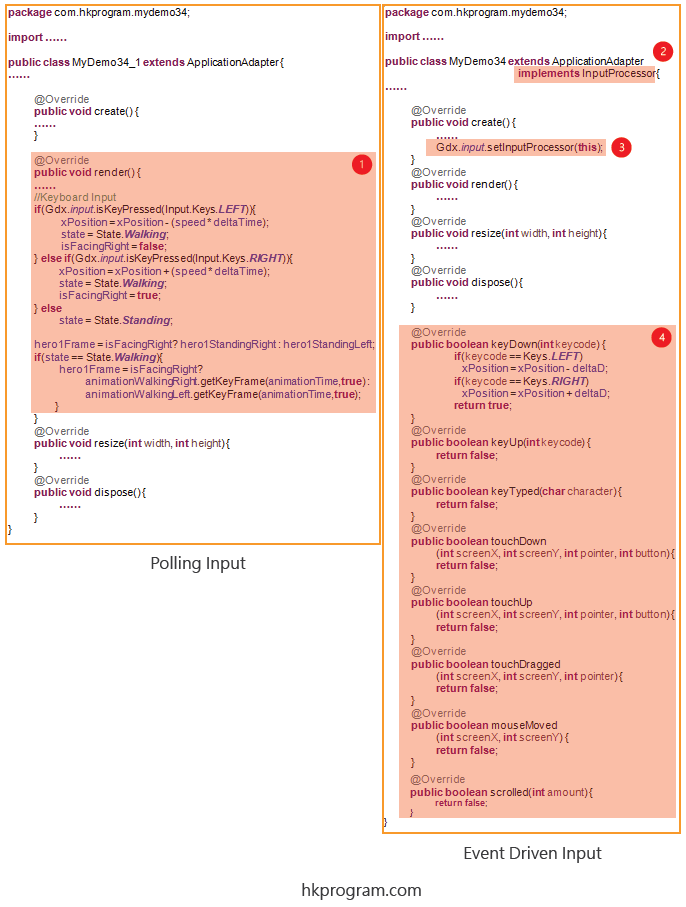
- 如果用Polling Input,偵測Keyboard, Mouse或Touch Screen動作就會在render()方法內完成。
- 如果用Event Driven Input,首先須要實作InputProcessor介面。
- 設定監聽動作Gdx.input.setInputProcessor(this);
- 在這例子裡,當Keyboard, Mouse或Touch Screen按下按鈕時,就會啟動以下方法:
keyDown()
keyUp()
keyTyped()
touchDown()
touchUp()
touchDragged()
mouseMoved()
scrolled()
注意,Keyword "this"相等於這個類別的物件。"this"=MyDemo34類別的物件=ApplicationAdapter類別物件=InputProcessor介面物件。因為MyDemo34類別繼承ApplicationAdapter,也實作了InputProcessor介面,所以"this"就可作MyDemo34或InputProcessor的物件用。
我也在第17節 - LibGDX: Splash Screen介紹過Keyword "this"。
以下是Polling Input和Event Driven Input的比較圖表:
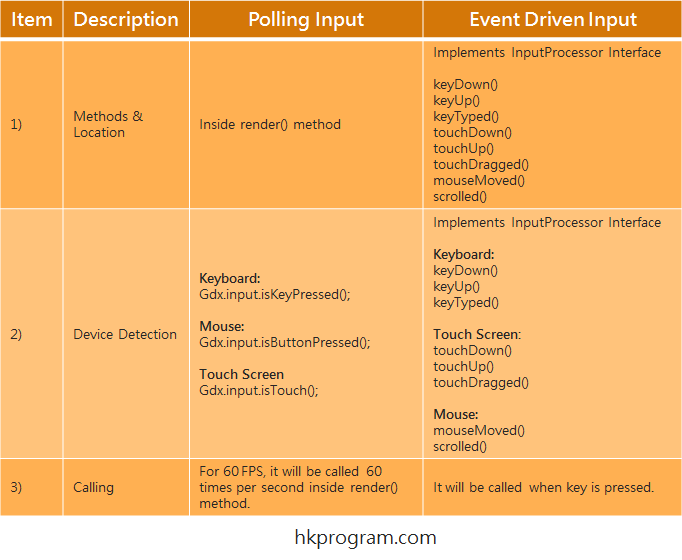
- 在Polling Input裡,偵測Keyboard, Mouse或Touch Screen動作就會在render()方法內完成。
在Event Driven Input裡,偵測Keyboard, Mouse或Touch Screen動作就會在新增方法內完成。 - 在Polling Input裡,我們須要用到Gdx.input.isKeyPressed(),Gdx.input.isButtonPressed()和Gdx.input.isTouched()。
在Event Driven Input裡,偵測Keyboard, Mouse或Touch Screen動作就會在新增方法內完成。 - 在Polling Input裡,因為偵測Keyboard, Mouse或Touch Screen動作會在render()方法內完成,所以在60 FPS環境下,Gdx.input.isKeyPressed(),Gdx.input.isKeyPressed()或Gdx.input.isKeyPressed()一秒會執行60次。
在Event Driven Input裡,只會偵測到Keyboard, Mouse或Touch Screen動作才會執行。
以下收錄一些英文的解釋:
Polling Input
It is more efficient to use Event Drive Input for keyboard, mouse and touch screen input, rather than Polling. If you are doing input control in game loop (i.e. within render() method), this is going to happen on every frame or interval (60FPS), and this is not efficient approach.
Event Driven Input
It is important to realize that a keyDown event will be fired for each individual key fired, so if you want to hadnle multiple simutanious key presses, this may not be the best way to approach the subject.
If you want to move an actor using the Input Processor, you will notice that it will move only when the keydown is pressed. To continuously handle input, or to move a sprite, you could add a "flag" to your actor.
注意,最後提及的"flag",就是在程式內偵測狀態,則Yes/No,true/false等等。
我們所用的enum type,則State.Standing和State.Walking,就是用來做程式的"flag"。
我在第34節 - LibGDX: Keyboard, Mouse & Touch Screen Controlt介紹過enum type:
State.Standing
State.Walking
它們就可用來判斷動畫的最新狀態。
例子1 - Keyboard Input (Polling Input)
注意,這個例子與第34節 - LibGDX: Keyboard, Mouse & Touch Screen Controlt的例子1相同。
MyDemo34_1.java
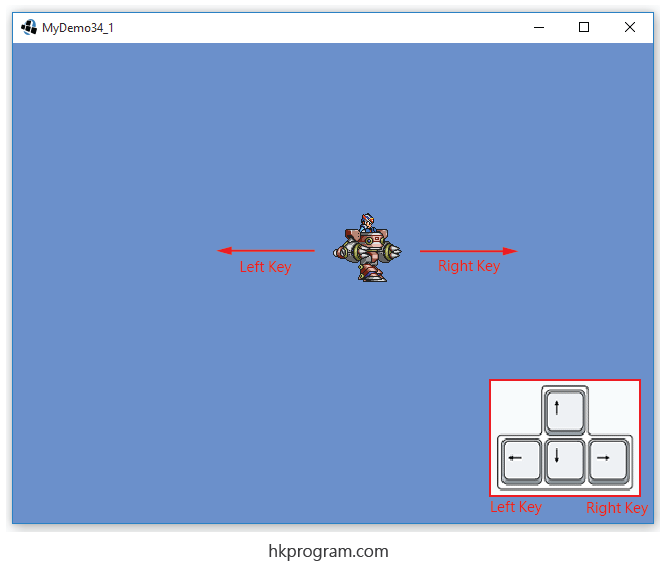
這個例子會詳細介紹用Keyboard控制動畫左右移動(Polling Input):
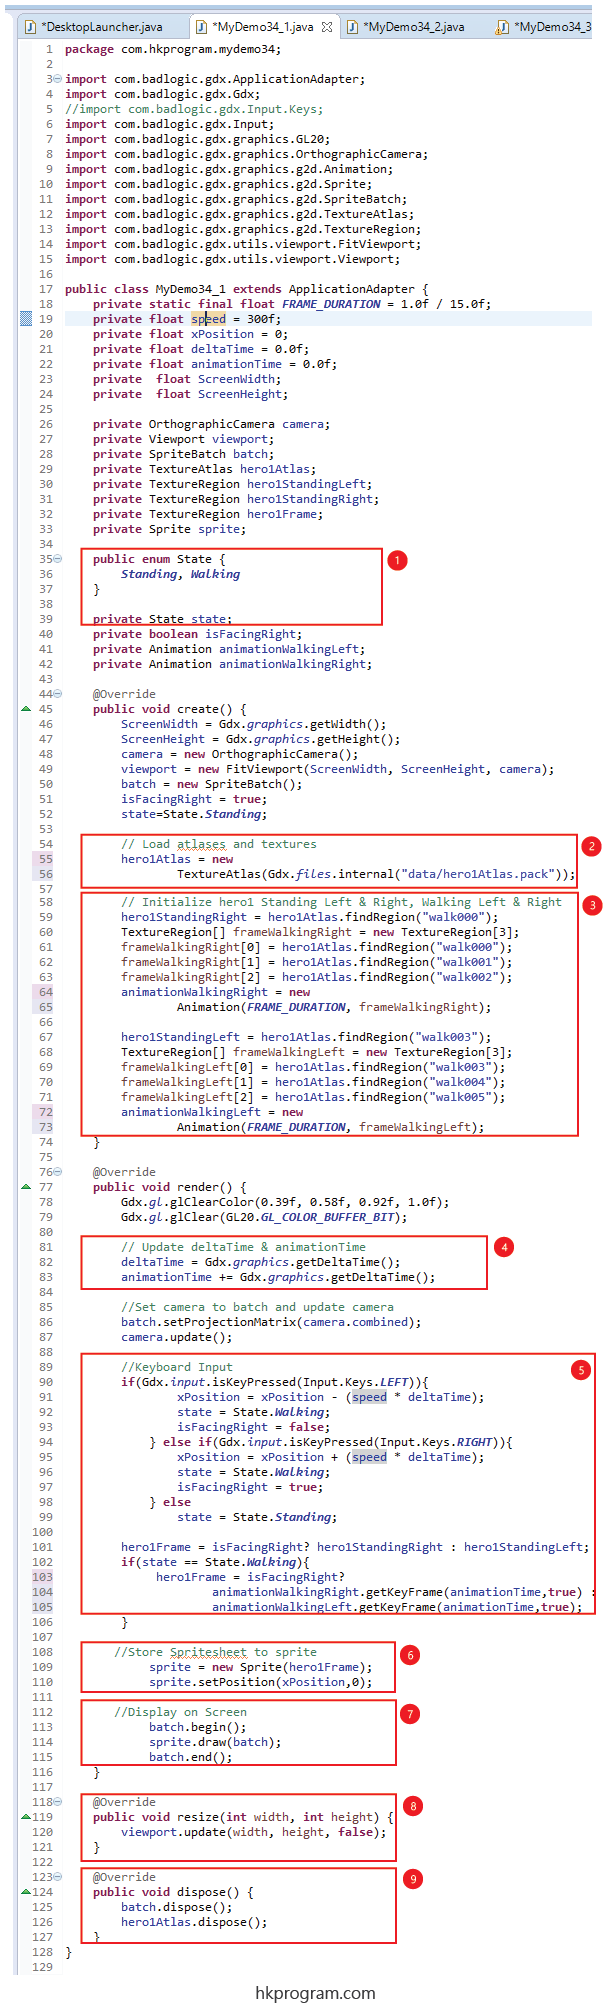
- 建立State (enum type)。
- 把Spritesheet(hero1Atlas.pack)傳入TextureAtlas物件(hero1Atlas)內。
- 建立Standing Left, Standing Right, Animation Left和Animation Right動作。
- 用LibGDX的Gdx.graphics.getDeltaTime(),它可以敢得兩格(two frames)動畫之間的時間,用來控制動畫的速度。+=是用來聚積animationTime時間值。
用animation.getKeyFrame()方法把animationTime變數傳入,這個方法可以自動計算animationTime的聚積時間值,並自動顯示正確的格數。 - 建立Keyboard的程式碼:
Keyboard: Gdx.input.isKeyPressed() - 把hero1Frame最新的格數傳入sprite內,並設定sprite的最新位置。
- 把sprite顯示在屏幕上。
- 因為我們有用到Viewport類別,當屏幕呎寸改變時,就須要更新Viewport。
- 最後呼叫dispose()方法,執行batch.dispose();和hero1Atlas.dispose();,釋放資源。
執行程式:
例子2 - Mouse Input (Polling Input)
注意,這個例子與第34節 - LibGDX: Keyboard, Mouse & Touch Screen Controlt的例子2相同。
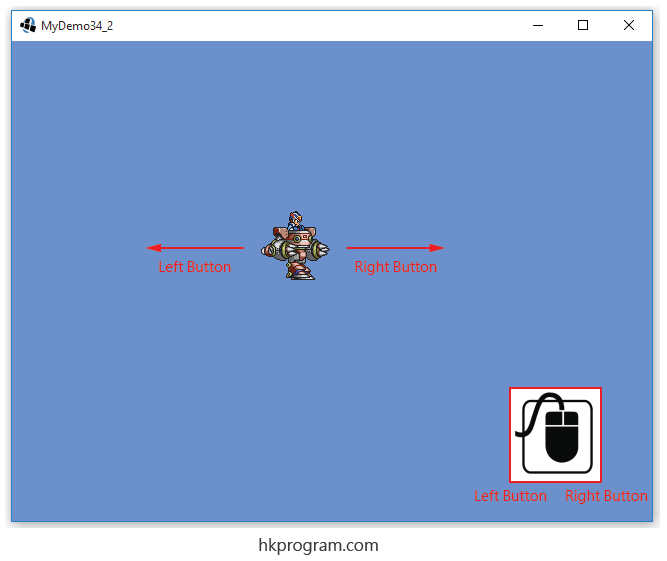
這個例子會詳細介紹用Mouse控制動畫左右移動(Polling Input):
MyDemo34_2.java
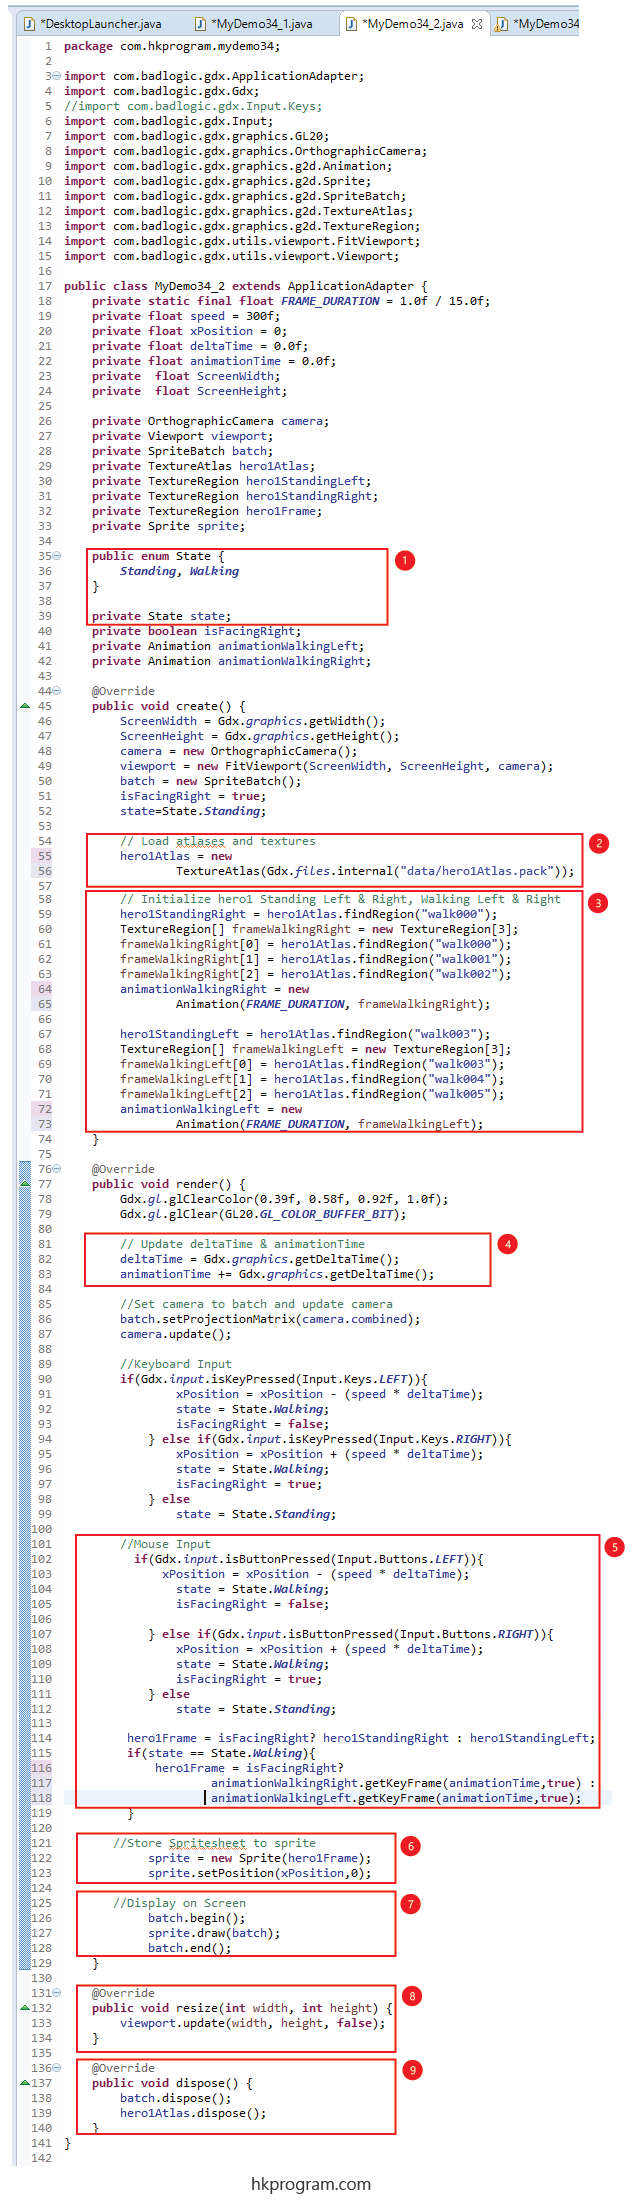
- 建立State (enum type)。
- 把Spritesheet(hero1Atlas.pack)傳入TextureAtlas物件(hero1Atlas)內。
- 建立Standing Left, Standing Right, Animation Left和Animation Right動作。
- 用LibGDX的Gdx.graphics.getDeltaTime(),它可以敢得兩格(two frames)動畫之間的時間,用來控制動畫的速度。+=是用來聚積animationTime時間值。
用animation.getKeyFrame()方法把animationTime變數傳入,這個方法可以自動計算animationTime的聚積時間值,並自動顯示正確的格數。 - 建立Mouse的程式碼:
Mouse: Gdx.input.isButtonPressed() - 把hero1Frame最新的格數傳入sprite內,並設定sprite的最新位置。
- 把sprite顯示在屏幕上。
- 因為我們有用到Viewport類別,當屏幕呎寸改變時,就須要更新Viewport。
- 最後呼叫dispose()方法,執行batch.dispose();和hero1Atlas.dispose();,釋放資源。
執行程式:
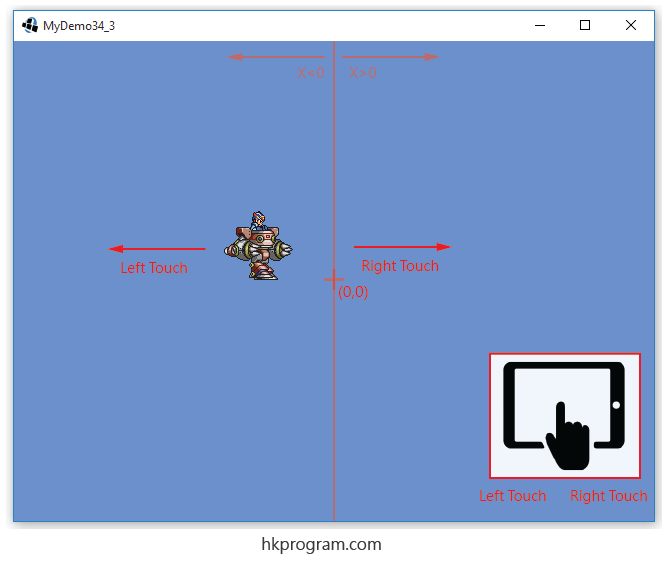
例子3 - Touch screen Input (Polling Input)
注意,這個例子與第34節 - LibGDX: Keyboard, Mouse & Touch Screen Controlt的例子3相同。
這個例子會詳細介紹用Touch Screen控制動畫左右移動(Polling Input):
MyDemo34_3.java
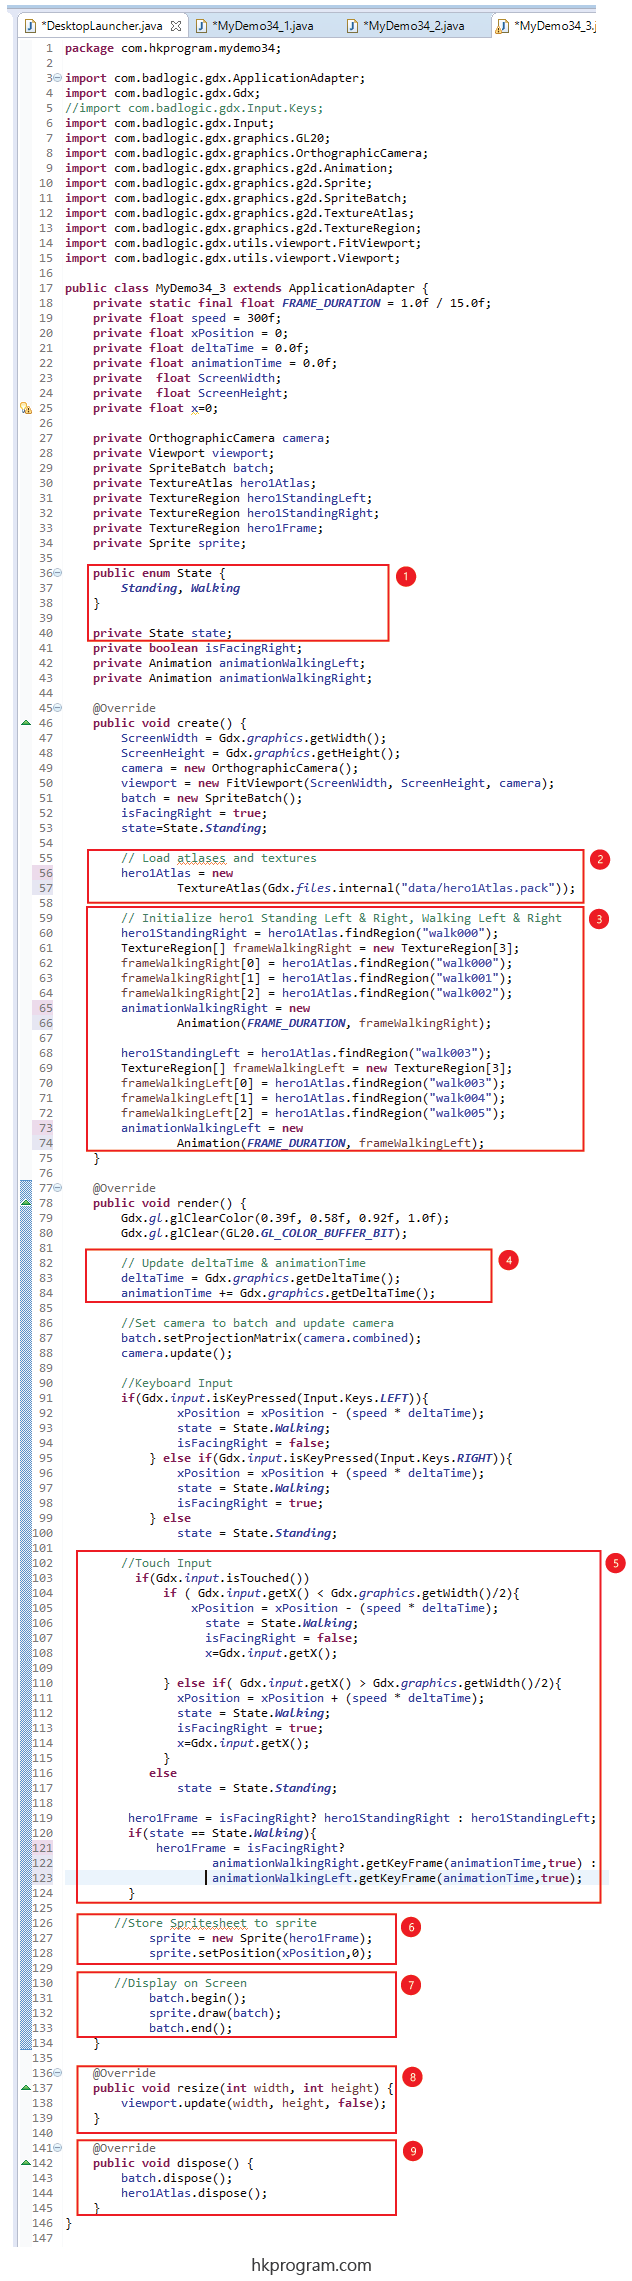
- 建立State (enum type)。
- 把Spritesheet(hero1Atlas.pack)傳入TextureAtlas物件(hero1Atlas)內。
- 建立Standing Left, Standing Right, Animation Left和Animation Right動作。
- 用LibGDX的Gdx.graphics.getDeltaTime(),它可以敢得兩格(two frames)動畫之間的時間,用來控制動畫的速度。+=是用來聚積animationTime時間值。
用animation.getKeyFrame()方法把animationTime變數傳入,這個方法可以自動計算animationTime的聚積時間值,並自動顯示正確的格數。 - 建立Touch Screen的程式碼:
Touch Screen: Gdx.input.isTouched() - 把hero1Frame最新的格數傳入sprite內,並設定sprite的最新位置。
- 把sprite顯示在屏幕上。
- 因為我們有用到Viewport類別,當屏幕呎寸改變時,就須要更新Viewport。
- 最後呼叫dispose()方法,執行batch.dispose();和hero1Atlas.dispose();,釋放資源。
執行程式:
例子4 - Keyboard, Mouse & Touch Screen Input (Event Driven Input)
這個例子會一次過把Keyboard、Mouse和Touch Screen程式碼放在以下例子來控制動畫左右移動(Event Driven Input):
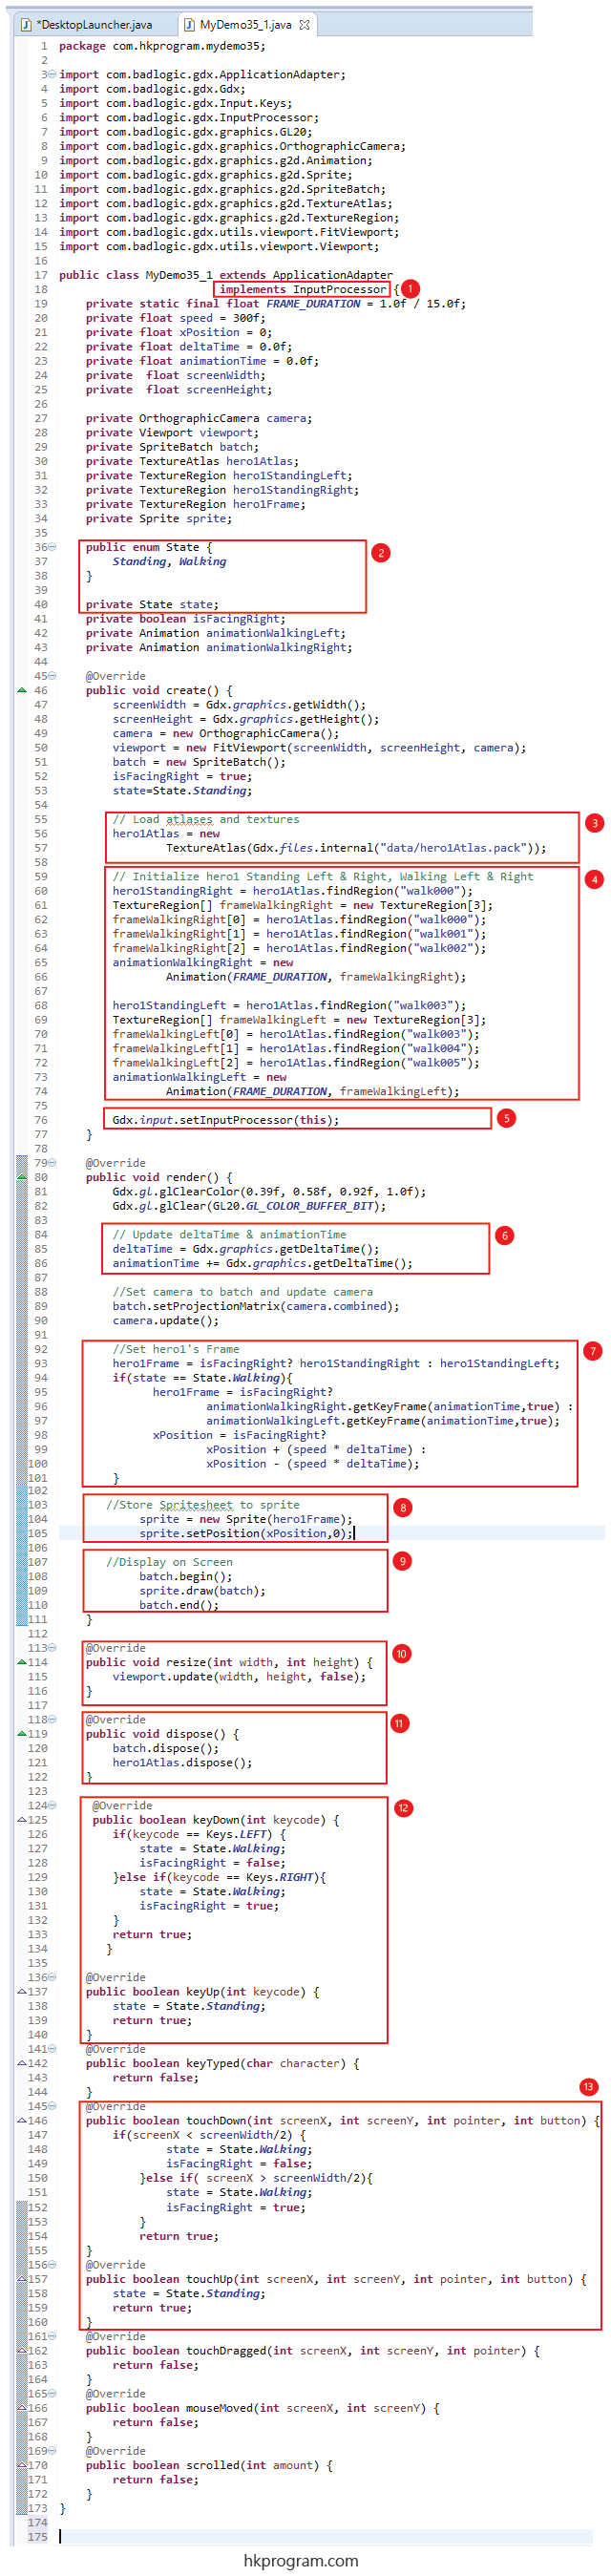
- 首先須要實作InputProcessor介面。。
- 建立State (enum type)。
- 把Spritesheet(hero1Atlas.pack)傳入TextureAtlas物件(hero1Atlas)內。
- 建立Standing Left, Standing Right, Animation Left和Animation Right動作。
- 設定監聽動作Gdx.input.setInputProcessor(this);
- 用LibGDX的Gdx.graphics.getDeltaTime(),它可以敢得兩格(two frames)動畫之間的時間,用來控制動畫的速度。+=是用來聚積animationTime時間值。
用animation.getKeyFrame()方法把animationTime變數傳入,這個方法可以自動計算animationTime的聚積時間值,並自動顯示正確的格數。 - 設定hero1Frame的最新格數。
- 把hero1Frame最新的格數傳入sprite內,並設定sprite的最新位置。
- 把sprite顯示在屏幕上。
- 因為我們有用到Viewport類別,當屏幕呎寸改變時,就須要更新Viewport。
- 最後呼叫dispose()方法,執行batch.dispose();和hero1Atlas.dispose();,釋放資源。
- 建立KeyDown()方法和KeyUp()方法的程式碼,這兩個方法就是供給Keyboard使用。
- 建立touchDown()方法和touchUp()方法的程式碼。
注意,這兩個方法可以供給Mouse或Touch Screen使用。
注意,Keyword "this"相等於這個類別的物件。"this"=MyDemo34類別的物件=ApplicationAdapter類別物件=InputProcessor介面物件。因為MyDemo34類別繼承ApplicationAdapter,也實作了InputProcessor介面,所以"this"就可作MyDemo34或InputProcessor的物件用。
我也在第17節 - LibGDX: Splash Screen介紹過Keyword "this"。
執行程式: